
Yes, you can grow juniper from berries, but go in with your eyes open: it is slow, technically demanding, and success is far from guaranteed. The "berries" are actually fleshy female cones, and the seeds inside them carry a complex, layered dormancy that can keep them sitting in the ground for two or three years before they decide to sprout. I have had seed batches that started germinating in year one and others that barely moved until year three. If you want junipers for your garden in the next season or two, buying nursery stock or taking cuttings is the smarter path. But if you enjoy a long-game propagation project, or you want to raise plants from a specific wild provenance, growing from berries absolutely works.
Can You Grow Juniper From Berries? A Practical Guide for Gardeners & Regions
Marcus Holloway
13 Jul 2026
Which juniper species should you try?
Juniper is a huge genus with around 60–70 species scattered across the Northern Hemisphere, and the species you choose matters enormously both for propagation success and for whether the plant will thrive in your climate. For seed propagation, the two species most home growers encounter are Juniperus communis (common juniper) and Juniperus virginiana (eastern red-cedar). J. communis has a circumpolar, cool-temperate distribution across North America, Europe, and Asia, making it broadly relevant to gardeners in USDA Zones 2–7. J. virginiana is native to eastern North America and handles Zones 2–9 with more heat tolerance. For warmer landscapes, think lowland South Asia or the US Deep South, Juniperus chinensis cultivars are a better fit; they are widely noted for heat and drought tolerance and are common in landscape practice across warmer temperate and continental climates.
Growth habit varies from sprawling ground covers barely 30 cm tall right up to trees topping 15 metres, so check what you are actually collecting before you start. J. communis ranges from a low, spreading shrub to a narrow upright tree depending on the ecotype. J. virginiana is a proper tree. Many ornamental forms sold in nurseries are selected compact or prostrate shrubs. If you are harvesting wild berries and want to match your planting site, collect from plants whose natural form suits your space.
| Species | Growth Form | USDA Hardiness | Best For |
|---|---|---|---|
| Juniperus communis | Shrub to small tree (0.3–10 m) | Zones 2–7 | Cool-temperate regions, culinary berries |
| Juniperus virginiana | Tree (to 15+ m) | Zones 2–9 | Eastern North America, wildlife plantings |
| Juniperus chinensis | Shrub to medium tree | Zones 4–9 | Warmer climates, drought-prone landscapes |
| Juniperus sabina | Low spreading shrub | Zones 3–7 | Ground cover only — berries are toxic, not for culinary use |
| Juniperus scopulorum | Tree (to 10 m) | Zones 3–7 | Rocky Mountain and Great Plains regions |
Edibility and safety: are juniper berries edible or toxic?
This is genuinely important and worth pausing on before you harvest anything. Juniperus communis is the culinary species. Its ripe, dried cones are used to flavour gin and are used in small amounts in cooking, game dishes, sauerkraut, marinades. They are safe in culinary quantities for most adults, though pregnant women should avoid them due to potential uterine effects even from J. communis.
Juniperus sabina (savin juniper) is a different story entirely. It is well documented as toxic, containing volatile oils that are abortifacient and potentially dangerous even in small doses. It appears on multiple poisonous-plant databases. The problem is that savin can look similar to other junipers at a glance. Species identification before any foraging or consumption is non-negotiable. If you are not confident in your ID, do not eat the berries and do not let children near them. For propagation purposes all Juniperus species are handled the same way, but for edibility, stick strictly to confirmed J. communis.
Where do juniper berries grow and natural habitat
Juniperus communis grows across a remarkably wide natural range, one of the widest of any woody plant. You find it across Canada, the northern and western United States, across Europe from the British Isles to Siberia, and into North Africa and the Himalayas. For a detailed map of where juniper berries grow, see where does juniper berries grow. In the wild it colonises open, well-drained and often calcareous (chalky or limestone) sites: heathlands, moorland edges, chalk downlands, open woodland, and rocky hillsides. It is a plant of dry, sunny exposures and thin soils, which is exactly what it wants in your garden too.
In terms of growth form, juniper is a shrub or small tree, never a vine. It does not grow in bogs or wet ground the way cranberries do. Full sun and sharp drainage are its defining requirements. This matters for where you site young plants once you have germinated them, and it also tells you where to look when foraging for berries: sunny, open hillsides and rocky edges are far more productive than shaded woodland understory.
How juniper berries compare to goji, wolfberry, and juneberry
Readers who follow this site will know that "berry" is a loose term that covers wildly different plants. It is worth placing juniper in context. Goji berries and wolfberries (Lycium species) are true fruits from vining or arching shrubs; they grow on long flexible canes and are eaten fresh or dried. Juneberries (Amelanchier species) are tree or large-shrub fruits from the rose family, sweet and blueberry-like, that ripen early summer. For more on their native ranges and preferred habitats, see our guide on where do juneberries grow. Juniper "berries" are not botanical berries at all, they are fleshy modified cones from a conifer, similar in structure to a pine cone with scales that have fused and become succulent.
From a growing perspective the differences are substantial. Goji and wolfberry propagation is straightforward compared to juniper, cuttings root readily and plants fruit within one to two years. Juneberries can be grown from seed with simpler stratification requirements and generally sprout more reliably. Juniper seed propagation is genuinely in its own category of difficulty, requiring much longer stratification windows and accepting much higher failure rates. If your primary goal is homegrown edible berries, goji or juneberry will give you a faster, more predictable result. For readers in India, see where goji berries grow in India for guidance on suitable climates and regions for Lycium cultivation. For growers in Canada, see our guide on growing goji berries in Canada for climate‑specific advice. Juniper is worth the effort if you specifically want it for its landscape value, wildlife benefit, or culinary cones.
| Berry | Plant Type | Propagation Ease from Seed | Time to First Harvest | Edible? |
|---|---|---|---|---|
| Juniper (J. communis) | Coniferous shrub/tree | Difficult (complex dormancy, 1–3+ years germination) | 5–10+ years | Yes (ripe cones, culinary amounts — J. communis only) |
| Goji / Wolfberry (Lycium spp.) | Arching shrub/vine | Moderate (simpler stratification) | 1–2 years | Yes (fresh or dried fruit) |
| Juneberry (Amelanchier spp.) | Shrub or small tree | Moderate (cold stratification, 3–4 months) | 2–4 years | Yes (sweet, blueberry-like) |
Should you attempt growing from berries? Pros and cons vs faster options
I want to be honest here because this is where a lot of people waste a year of effort. Growing juniper from seed is the slowest and least predictable option available to you. Some seedlots achieve 50–60% germination under ideal long cold-moist stratification in controlled trials, but real-world home germination rates of 5–20% are common, and many batches show seeds continuing to emerge in years two and three. Empty and aborted seeds are a persistent problem, some populations carry a high proportion of non-viable seeds that look perfectly fine from the outside.
That said, there are genuine reasons to do it. Seed-grown plants from a local wild provenance will be better adapted to your specific climate than nursery stock raised elsewhere. If you are in a region where juniper nursery plants are hard to source, or you want a specific ecotype, seed is your best option. Growing from cuttings is faster (roots in one season, transplantable in year two) and produces plants identical to the parent. Buying nursery stock is fastest of all. Here is how the options stack up:
| Method | Time to Transplantable Plant | Difficulty | Best For |
|---|---|---|---|
| Seed from berries | 2–4 years | High | Provenance-matched plants, restoration, patient growers |
| Semi-hardwood cuttings | 1–2 years | Moderate | Cloning a specific plant, faster results |
| Nursery transplant | Immediate to 1 season establishment | Low | Fastest results, known cultivar |
My honest recommendation: try seed propagation if the process itself interests you, but take cuttings or buy a nursery plant at the same time so you are not waiting three years with nothing to show for it.
When and where to harvest juniper berries
Timing is everything. Juniper cones take one to two years to mature (sometimes longer depending on species and climate), and plants often carry cones of different ages simultaneously, so you need to pick only the fully ripe ones. Ripe J. communis cones are blue-black with a dusty, glaucous (waxy) bloom on the surface. Under-ripe cones are green. Harvest in late summer to autumn in most temperate regions, typically August through October in the Northern Hemisphere. Ripe cones should feel slightly soft when squeezed; hard, green cones are not ready.
On foraging and legal considerations: in many countries, collecting small quantities of berries from wild plants for personal use is permitted, but rules vary by land ownership and protected status of the site. In the UK, for example, J. communis is a protected native species in some priority habitat areas; take only what you need and do not strip plants. In North America, collecting from national parks or protected areas is restricted. Always check local regulations before harvesting. From private land (your own or with permission), harvest freely. Aim to collect at least 50–100 cones to start with, since seed viability is variable and you want enough raw material to account for losses.
Extracting and cleaning seeds from juniper berries: step-by-step
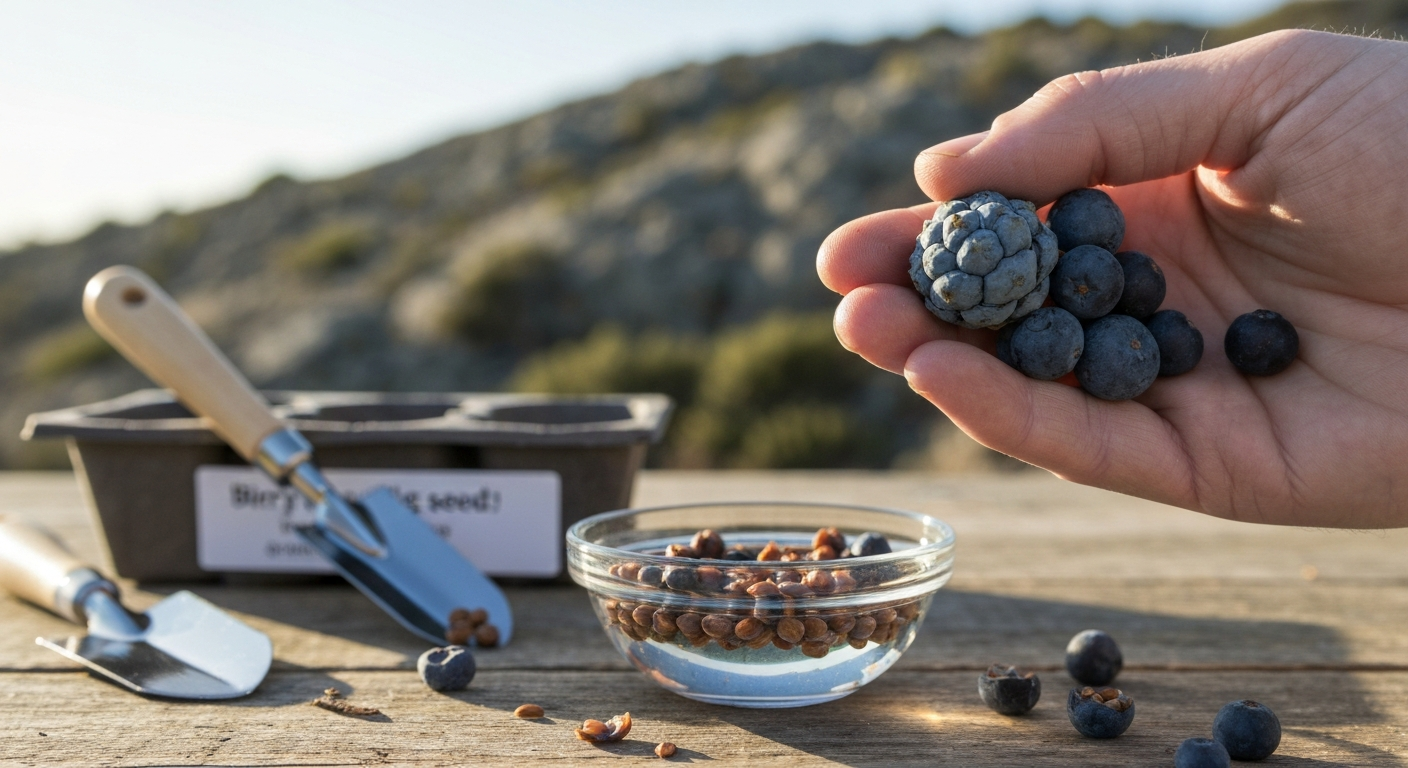
Cleaning seeds out of the fleshy cone pulp is one of the most important steps you can take. Research comparing cleaned seed versus whole berries found cleaned seed roughly doubled germination rates. The pulp contains germination inhibitors, so leaving seeds buried in it actively works against you. Here is the process I use, informed by Forestry Commission and USDA protocols: RNGR / Native Plant Network, Juniperus propagation protocols (seed treatments listed) recommend an initial running‑water rinse, a warm, moist pre‑stratification when used, followed by an extended cold, moist stratification (examples include ~60 days warm moist then ~90 days cold; other protocols range up to several months warm plus 3–12+ months cold depending on species and provenance) RNGR / Native Plant Network — Juniperus propagation protocols (seed treatments listed) recommend an initial running‑water rinse, a warm, moist pre‑stratification when used, followed by an extended cold, moist stratification (examples include ~60 days warm moist then ~90 days cold; other protocols range up to several months warm plus 3–12+ months cold depending on species and provenance)..
- Macerate the cones: place your harvested berries in a bowl of water and crush them by hand or use a coarse sieve to break up the flesh. Add more water and keep working the mixture until the seeds separate from the pulp.
- Float off debris: tip the mixture into a bucket and run water in slowly. Empty seeds, pulp fragments, and other debris will float; viable, dense seeds sink. Pour off the floating material and repeat two or three times. This step also lets you do a quick viability check — discard anything that floats.
- Acid rinse (optional but beneficial): a soak in a 1% citric acid solution for about four days has been shown in controlled trials to further improve germinability by removing remaining inhibitory compounds. Rinse the seeds thoroughly in clean water after the soak.
- Cut test for viability: cut a small sample of cleaned seeds in half with a sharp knife. Viable seeds have firm, white or creamy interior tissue. Empty or aborted seeds have hollow or shrunken interiors. If more than half your sample is empty, collect more berries before investing in a long stratification.
- Warm moist pre-stratification: place cleaned, viable seeds in a sealed plastic bag with damp (not wet) vermiculite or peat-free compost. Store at room temperature (around 13–20°C) for 8–14 weeks. This helps break embryo dormancy for species and seedlots that have underdeveloped embryos at the time of harvest. In Canada and other cold climates, starting this stage in late summer (August–September) fits naturally into the annual cycle.
- Cold moist stratification: move the sealed bag to your refrigerator at approximately 1–5°C. This is the most critical stage. Aim for a minimum of 30 weeks (about 7 months), and longer (up to 50 weeks) produces better results in trials. Check bags monthly for mould and ensure the medium stays just barely moist throughout.
- Sow in spring: after cold stratification, sow seeds into trays or individual small pots filled with a well-drained, gritty seed compost. Sow at about 5 mm depth. Place in a cold frame or unheated greenhouse — juniper seedlings do not need warmth to germinate and respond better to cool, bright conditions.
- Be patient: expect the first seedlings to appear anywhere from 4 weeks to several months after sowing. Do not discard trays that seem unresponsive — mark and keep them. Many seedlots continue emerging in year two and year three. Keep the medium moist but never waterlogged, and protect trays from rodents (mice find stratified juniper seeds extremely appealing).
Getting seedlings established: soil, site, and containers
Once seedlings are up and have developed their first true leaves (the juvenile needle-like foliage), they need bright light immediately. Shade at this stage causes etiolated, weak growth that rarely recovers well. Grow them on in individual pots for at least one full growing season before transplanting. A gritty, free-draining compost mix (50% peat-free compost, 50% horticultural grit or perlite) works well for container growing. Avoid any compost that holds water for long periods.
For gardeners in colder climates including much of Canada, container-grown seedlings through their first and second winters need insulation from freeze-thaw cycling that damages pot-grown roots more severely than in-ground plants. Wrapping pots in burlap, sinking them to their rims in the ground over winter, or moving them to a cool but frost-free shelter (unheated garage, cold frame) all work. Once plants are large enough to go into the ground, typically at two to three years old and 20–30 cm tall, plant into full sun in the best-drained site you have. Chalk, sandy, and rocky soils are ideal. Heavy clay and poorly drained sites are where young junipers fail most consistently.
Ongoing care: watering, pruning, and common problems
Established junipers are remarkably low-maintenance. During the first season after transplanting, water regularly to support root establishment, then back off. Mature junipers handle drought well and are often damaged by overwatering more than drought. Pruning requirements are minimal, remove dead or crossing branches in early spring, but avoid cutting back into bare, old wood since most junipers do not regenerate from leafless stems the way broadleaf shrubs do.
The main disease concern is Phytophthora root rot, which almost always follows poor drainage or overwatering. Juniper tip blight (Phomopsis or Kabatina fungi) can affect plants in wet summers; remove and bin affected shoot tips and improve air circulation. Juniper scale insects and spider mites can occur, particularly on container-grown plants in dry indoor conditions over winter. A horticultural oil spray in early spring handles most scale problems. From a rodent perspective, young seedling trays and newly transplanted plants are targets for mice and voles, particularly in rural areas, use wire guards around young transplants in the first winter.
Region-specific tips: Canada, India, and warmer climates
For Canadian growers, the good news is that Juniperus communis is genuinely native across much of the country and well adapted to long cold winters, your climate is actually well suited to outdoor stratification if you time it right. Sow cleaned seeds into pots in autumn and overwinter them in an unheated cold frame or buried to their rims outdoors. Natural winter cold does the stratification work for you. Protect against rodents and snow mould. British Columbia propagation guides recommend a warm pre-treatment of roughly 14 weeks followed by 12–20+ weeks of cold, so an August start for warm stratification followed by an outdoor cold period from November onwards aligns well with the natural cycle. British Columbia government propagation guidance for common juniper recommends a warm pre-treatment of roughly 14 weeks followed by 12–20+ weeks of cold stratification (Propagation of interior British Columbia native plants from seed, common juniper) Propagation of interior British Columbia native plants from seed — common juniper (BC government / propagation guide).
For growers in warmer regions, lowland India, the southern US, or similar climates, Juniperus communis is generally not the right choice. For specifics on whether juniper berries grow in India and which species suit lowland Indian climates, see the guide on do juniper berries grow in India. It struggles with prolonged heat and humidity. Juniperus chinensis and its many cultivars are a much better fit: they are widely planted in warmer temperate and continental climates and handle heat and drought well once established. Propagation from semi-hardwood cuttings is far more reliable than seed for these cultivars anyway. Prioritise full sun, excellent drainage, and mulching to moderate soil temperatures in the establishment phase.
Troubleshooting: when nothing germinates
If you complete a full stratification cycle and see no germination, do not panic and do not throw out the trays. First, check that your stratification temperatures were genuinely cold, a refrigerator running at 8–10°C rather than 2–4°C substantially reduces effectiveness. Second, examine a few unsprouted seeds with a cut test to determine if they are viable at all. High rates of empty seeds are common in some populations and there is nothing you can do with non-viable seed no matter how long you stratify it. Third, consider whether your seed source was fully ripe, green or immature cones at harvest dramatically reduce success rates.
If seeds look viable but still have not moved after a full season, return the tray to refrigerator cold for another 8–12 weeks and try again. Some seedlots genuinely need a second or even third cold period. This is frustrating but entirely normal for Juniperus. If after two full stratification cycles you are still seeing nothing, it is time to source fresh seed from a different population and start the process again, or take cuttings from the plant you wanted to propagate in the first place.
FAQ
Can you grow juniper from berries?
Yes — but it’s slow and often difficult. Juniper “berries” are fleshy female cones that contain seeds. Seed must be extracted and dormancy broken (usually with long cold‑moist stratification, sometimes preceded by a warm period) before sowing. Germination is variable and can be spread over multiple years, so expect low to moderate success and patience (seedlings commonly appear 1–3+ years after treatment).
Should I sow whole juniper berries or extract the seeds first?
Extract the seeds. Removing the berry flesh (pulp) significantly increases germination rates versus sowing whole berries. Clean seeds by macerating the fruit and rinsing under running water or using flotation to discard empty fruit, then dry briefly before stratification. Cleaning helps remove chemical inhibitors and reduces rot risk during stratification/sowing.
How do I harvest and prepare juniper berries for seed?
Harvest only fully ripe cones (bluish‑black with a glaucous bloom; many species take ~2 years to mature). Collect in dry weather if possible. To prepare: hand‑macerate or crush a small batch, rinse in running water to free seeds and separate pulp, discard light/empty fruit (float test helps), then optionally soak cleaned seeds briefly in a 1% citric acid solution (used in some protocols) before moist storage. Work with small batches to avoid mould.
How do I extract and clean juniper seeds step by step?
1) Crush ripe berries lightly in a bowl. 2) Add water and stir; viable seeds sink while pulp and empty cones float—decant off floaters. 3) Repeat rinsing until water runs clear. 4) Inspect and hand‑pick remaining pulp. 5) Optionally soak seeds briefly in a mild acid (protocol‑dependent), then rinse again. 6) Air‑dry slightly, or place seeds in moist medium (vermiculite/peat) immediately for stratification. Avoid prolonged exposure to warm damp conditions without treatment to limit mould.
What stratification or dormancy‑breaking treatment do juniper seeds need?
Most Juniperus spp. need cold‑moist stratification; many seedlots respond best to a warm‑moist period followed by an extended cold‑moist period. Common practical schedules: warm moist (≈10–20°C) for several weeks to a few months, then cold moist (0–4°C) for 3–12+ months. Some protocols report best results with ~30–50 weeks cold. Treatments vary by species and provenance, so expect to try different schedules or follow a protocol for your species.
Can I use scarification, acid, or GA3 to improve germination?
Some studies show scarification, dilute acids, or gibberellic acid (GA3) can improve germination for certain Juniperus species by weakening the seedcoat or influencing physiological dormancy. These treatments are species‑ and seedlot‑specific and should be used cautiously. For most home gardeners, thorough cleaning plus a long cold‑moist stratification is the simplest effective approach; consider hormonal or chemical treatments only if following a tested protocol.